Showing posts with label lacto-ovo vegetarian. Show all posts

Saturday, November 29, 2014

Stuffed Peppers Two Ways - Meat or Vegetarian


I wrote this recipe to be 1/2 vegetarian and 1/2 meat as lots of times we need both to satisfy a crowd.  If you're vegetarian skip the meat instructions and double or triple the amount of rice .  You can use leftover cooked rice in this recipe or any cooked grain such as quinoa or millet.  If you have leftover meat filling bake it in a small oven proof bowl and use it as a mini-meatloaf  or sliced for sandwiches.

Click on this link to print recipe.

INGREDIENTS:
1 cup brown rice, raw - 250 ml
6 sweet peppers, medium - I used 2 each red, yellow and green
1 jalapeno pepper (optional)
3 cloves of garlic
1 cup white onion finely diced
1/2 cup ketchup, barbecue or tomato sauce
2 eggs, medium
1 cup mushrooms, chopped fine
1 cup carrot grated - 250 ml
2 tsp each basil, ground cumin and chili powder
1/2 tsp sea salt - 2.5 ml
1/2 cup water - 125 ml for bottom of baking dish


Variations for this very flexible recipe: grated cheese for top of peppers.  Use any type of spices or herbs you like and have on hand such as Italian seasoning, dill, black pepper etc.  You can also used frozen mixed vegetables instead of the fresh and leftover cooked rice.  Other cooked grains like millet and quinoa also work well in place of the rice. 


METHOD:
Preheat oven to 350'F (190 'C)
1.  Cook the brown rice in unsalted water according to package directions.
2.  Cut peppers in half vertically through the stems and discard inner seeds and membranes.  Keep the stems on as they look nice and help to hold in the filling.


3.  Mix all the ingredients except for ground chicken/turkey/beef with cooked rice.  Set half aside for the vegetarian batch.  Omit the egg if you are vegan.  They won't stick together as well without the egg but it will still work.  Add 90 ml water and 30 ml flour for some "glue" for vegan stuffed peppers if egg is omitted.


4.  Add ground chicken/turkey/beef to other half of rice and mix well.


5.  Fill half the peppers with vegetarian rice mixture and the other half with the meat and rice filling. You can mound them fairly high.  Arrange in a baking dish and add water to bottom of baking dish. Sprinkle over grated cheese of your choice (optional).  The picture below shows the vegetarian stuffed peppers.


6.  Bake for 45 minutes or until chicken is set and peppers are cooked through to an internal temperature of 175'F (77'C).


Nutrition Facts (per 1/2 meat stuffed pepper): 160 calories, 7 g fat, 2 g saturated fat, 60 mg cholesterol, 21 g carbohydrate, 2 g fibre, 5 g sugar, 250 mg sodium, 10 g protein. %Daily Values are 2% calcium, 6% iron, 6% vitamin A and 200% vitamin C.

Yours in good taste, © Nancy Guppy, RD, MHSc.  http://nancyguppy.com/

Pumpkin Stew with Fresh Chiles & Feta Cheese


I am making this hearty, comforting pumpkin dish tonight.  It is one of my daughter's favourites and it reheats well.  I use pumpkin and squash interchangeably in most recipes depending on what I have on hand.  Use fresh and not canned pumpkin which is pureed. Alternately, a good substitute is a dense orange squash like butternut.  The original recipe was from Peru and it was made with serrano peppers which are 5 times hotter than jalapenos.


Below the cayenne peppers are spread out to ripen in the house.  I had them near the fire for a week or two which helped totally dry them out for storage


Click this link to print recipe.

ORGANIC INGREDIENTS
Makes six servings about 300 grams each

1 Tbsp (15 ml) sunflower or other neutral oil like grapseed
1 cup (250 ml) onion, raw, chopped - I use red
2 cloves garlic, minced
1 fresh cayenne, serrano or jalapeno pepper, minced (to taste) - I used 2 dried cayenne
2 potatoes, with skin, raw, cut into cubes - I prefer red potatoes but any will do
8 cups (2 liters) pumpkin, raw, cubes (or squash or sweet potatoes)
1/4 cup (60 ml) water - add more as necessary
1/4 cup (60 ml) milk or cream (coconut milk works if you need a non-dairy version)
1 cup (250 ml) Ontario cheese like brebis, feta or semi-soft goat cheese (skip cheese for non-dairy or vegan version)
1/4 tsp (1.25 ml) sea salt
1/2 tsp (2.5 ml) black pepper, freshly ground
1/2 cup (125 ml) cilantro, fresh, minced (or parsley, oregano)

METHOD:

1.  Heat oil in non-stick skillet over medium high heat.  Saute chopped onion, minced garlic and chiles until soft and fragrant.  I used a few of my dried garden cayenne peppers.


 2.   Scrub potatoes but leave the skins on for extra fibre and nutrition.  Dice into bite-size squares.


3.  Peel and cut fresh pumpkin (or squash) into cubes.  I use a very sharp chef's knife to split the pumpkin in half and set aside the seeds to dry for the summer garden.  I cut it into strips, peel and cube as below.  It is a bit of work but worth the effort. 
 

I save my vegetable scraps in a bag and freeze them.  I will use them later to make a fragrant vegetable broth.  Pumpkin is really nice in vegetable stocks as it imparts a sweet flavour and golden colour.


4.  Add diced raw pumpkin and potatoes with water to the skillet.  Cover and cook over medium low heat until the pumpkin and potatoes are tender.  I cooked mine 10 minutes and thought it was too long.  I like the pumpkin a bit less mushy.
 

5. Stir in the milk (or cream) and crumbled cheese and heat through.  I used goat cheese in tonight's version but I usually use feta.  It would also be good with the Brie, Brebis or Camembert cheese.  Brebis to me is the French equivalent to feta - a creamy, soft, unripened cheese made with sheep's milk.  PC brand is 26% MF and very delicious. If you want a dairy free version you can use coconut milk and skip the cheese.  Season with salt and pepper.  Garnish with fresh minced cilantro.  You can substitute fresh or dried oregano and/or parsley instead of the cilantro. 


Don't toss the pumpkin seeds!  You can dry them to plant in this summer's garden or toast them for a tasty snacks.  I will sit down and remove the "gunk" and spread them out on a tea towel to air dry.  I have good results and rarely have to buy pumpkin seeds.  I also save the seeds from any organic squash I buy at the store and grow some for myself.  Roast the seeds in a 350'F oven on a lightly oiled pan until lightly brown and toasted.

NUTRITION FACTS: Pumpkin a very versatile and nutritious vegetable that is very good in cookies, muffins, pancakes, pie, savoury quiche, soup, stews and casseroles.  The dark orange vegetables like pumpkin, winter squash, sweet potatoes and carrots outshines all others in beta carotene which our body converts to vitamin A. Research has found that a diet rich in beta-carotene can reduce your risk of developing certain cancers and helps prevent heart disease. Beta-carotene also maintains good vision and fights infection. They are also packed with fibre, antioxidants, vitamins B6, C and K as well as calcium, potassium and folate. The flesh of the pumpkin is lower in calories and carbohydrate compared to sweet potatoes.

Per 300 g/approximately 1 cup serving of the casserole has:
190 calories, 9 g fat, 4.5 g saturated fat, 25 mg cholesterol, 400 mg sodium, 24 g carbohydrate, 3 g fibre, 5 g sugar, 7 g protein.  % Daily Values are 60% vitamin A, 45% vitamin C, 20% calcium and 10% iron.

Yours in good taste, © Nancy Guppy, RD, MHSc.  http://nancyguppy.com/


Saturday, November 22, 2014

Red Quinoa with Pumpkin, Cranberries and Sunflower Seeds


Have you tried red quinoa (say KEEN-WAH)?  I love quinoa but when I first made this salad I hadn't seen this beautiful red variety before.  Since then I found out there are white, black and red varieties.


Red quinoa "is similar to the other quinoa varieties: high in protein, gluten-free, easy to digest and quick to cook. Red quinoa is predominately grown in Bolivia; other quinoas come mostly from Bolivia, Peru and Ecuador (and more recently, the United States). Rinse and cook red quinoa as you would other varieties: for breakfast, in salads, and mixed in with other grains for polenta and pilaf-like side dishes."  Click link to access a very concise whole grain glossary.

In this recipe I have combined red quinoa with toasted sunflower seeds, bog cranberries and more pumpkin.  You can use diced pears or apples if you don't want the pumpkin!  I have been on a bit of a pumpkin fest as I use up my winter supply and dry seeds for the garden.  My favourite way to cook quinoa is to use my rice cooker.  Follow the package directions for quinoa to water ratio and the rice cooker will take care of the rest

Click on this link to get a printable recipe.
INGREDIENTS:
Makes 4 servings.

1 cup (250 ml) red quinoa
2 cups (500 ml) water
2 cups (500 ml) pumpkin or firm winter squash like kabocha or butternut (peeled and diced)
1 cup (250 ml) fresh or frozen cranberries, halved or chopped as you prefer
1/2 cup (125 ml) red onion, diced fine
1 clove of garlic, minced
1 Tbsp (15 ml) ginger, fresh, grated
1 Tbsp (15 ml) olive oil, extra virgin
1/2 cup (125 ml) sunflower seeds, raw (or pecans, walnuts)
2 Tbsp (30 ml) fresh parsley, minced
1 tsp (5 ml) cumin, ground
1 tsp (5 ml) curry power
1 tsp (5 ml) turmeric, ground
2 Tbsp (30 ml) maple syrup - I used Schloesser's, Trout Creek
2 Tbsp (30 ml) apple cider vinegar (like Eden organic)
1/4 tsp (1.25 ml) Sea salt

METHOD:
1.  Toast quinoa over medium-high heat in a non-stick pan for 2 minutes.  Shake it and move it around with a wooden spoon so it doesn't burn.  Toasting quinoa burns off the surface saponins and gives it a nuttier flavour.
2.  Then toast sunflower seeds in a large dry skillet. Heat until fragrant while shaking to prevent burning.  Pecans and walnuts are also favourites of mine in this salad.
3.  Bring 2 cups (500 ml) of water to a boil and add quinoa; reduce heat to low and cover.  Use a 1:2 ratio of quinoa to water.   Cook for 15 minutes or according to package directions until grain is tender and liquid is absorbed.  Add frozen cranberries during the last 5 minutes of cooking.  Turn off heat and set aside to cool.


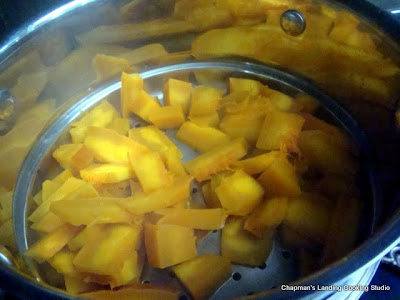
4.  Cut the pumpkin or squash in chunks and steam until tender (not mushy).  I noticed they sell cut up squash at the store so you could use that if you want a quick solution.


5.  Heat oil in a non-stick pan and saute onion, garlic and ginger with the cumin, curry and tumeric over medium high heat for 3 minutes or until softened.  Remove from heat.

6.  Toss with the cooked quinoa, steamed pumpkin, maple syrup, apple cider vinegar and minced fresh parsley.

NUTRITION FACTS (per 1 cup/250 ml): 190 calories, 4.5 g fat, 0.5 g saturated fat, 0 mg cholesterol, 35 g carbohydrate, 4 g fibre, 10 g sugar, 6 g sugar, 8 g protein.  % Daily Values (based on a 2,000 calorie diet) are 30% vitamin A, 40% vitamin C, 8% calcium, 35% iron.


Italian Baked Beans (gluten free)


Pioneer Baked Beans was one of the most popular posts at my blog with time more then 6,000 hits.  Who'd a thought? Retro and comfort foods are supposed to continue to be big this year and as the weather gets colder here I for sure have been turning to home cooked soups, stews and casseroles.

Often I don't want the meat and the fat from the pork so I make a vegetarian version of baked beans. I have made these beans in the oven in a casserole baking dish, cast iron Dutch oven and also in a slow cooker. My instructions show slow cooker method followed by stove top and oven. The version below has cheese but it is easy to make VEGAN by skipping the cheese or topping with my recipe for quinoa polenta and toasted sunflower seeds.

Click this link for a printable recipe.

INGREDIENTS:
1 cup White pea or “Navy” beans - any dry bean - 250 ml
½ tsp Fennel seed - 2.5 ml
½ tsp Thyme - 2.5 ml
1 tsp Basil - 5 ml
1 Tbsp Hot chile pepper - 15 ml
1 cup Onion, diced - 250 ml
2 Garlic, cloves, minced 
24  Carrots, baby, medium 
28 fl oz Diced tomatoes, canned, with juice - 798 ml
5 fl oz Tomato paste, canned - 156 ml
1 cup Wine, white, dry - 250 ml
1 ¼ lb Polenta, tube, ready to serve (e.g., Aurora brand) - ½ kg
¼ cup Romano cheese, shredded - 60 ml
1 cup Mozzarella cheese, part skim, shredded  - 250 ml
¼ cup Parsley, fresh, minced - 60 ml
½ tsp Paprika, sweet, ground - 2.5 ml

SLOW COOKER METHOD:
1. Soak beans in plenty of cold water over-night - use three times their volume of water. You can do this in the crock of the slow cooker. Drain.
2. Add fennel, thyme, basil, a whole chili (optional), chopped onion and minced garlic to the beans. Add 2 liters (8 cups) cold water to cover. This amount of water is an estimate. You can add more later if it is needed.
3. Stir in whole baby carrots. I used some cubed rutabaga the second time I made this as I was out of carrots. Necessity is the mother of invention. Cover and cook on LOW 4 hours. The beans should be tender and most of the liquid absorbed. It looks a little monotone with the turnip but this gets corrected.


4. Stir in slivers of coloured peppers, canned diced tomatoes with liquid, tomato paste and white wine. Cover and cook an additional. 2 hours. Taste it and see if it needs salt, more herbs etc. The polenta and cheese topping will add some saltiness so go easy.


5. Slice polenta into rounds.


Arrange polenta rounds on top of the beans. Push them down into the beans a bit.


Then sprinkle on the grated Romano and mozzarella cheeses (optional). I sprinkled on some fresh parsley and paprika last for colour.


Cover and heat on low until bubbling and cheese is melted. I don't have a picture of the final product as my son and I were pretty hungry and had devoured a lot of it by the time I remembered I hadn't taken a picture.

STOVE TOP version:
1. Add dry beans to stockpot and cover with 3 times their volume of water. Bring to a boil for 2 minutes. Remove from heat, cover and let sit 1 hour.
2. Drain discarding liquid. Return soaked beans to pot along with 3 times their volume fresh water. Add fennel, thyme, basil, hot pepper, diced onion and minced garlic. Bring to a boil; reduce heat and simmer 30-45 minutes or until tender. Drain, reserving 2 cups cooking liquid.
3. In oven proof casserole combine cooked beans, reserved liquid, baby (or chopped) carrots, slivers of yellow pepper, can of tomatoes with juice, tomato paste and white wine. Cover and bake at 350'F for 2 hours.
4. Top with sliced polenta rounds. Push them down into the beans a bit. Then sprinkle on the grated Romano and mozzarella cheeses (optional). I also sprinkled on some fresh parsley and paprika last for colour. Cover and bake another hour or so until bubbling and cheese is melted.

Nutrients (per 1/8th of recipe – about 350 g): 280 calories, 14 g protein, 5 g fat, 2.5 g saturated fat, 37 g carbohydrate, 10 g fibre, 10 mg cholesterol, 640 mg sodium.  %DV (Daily Value) are 25% calcium and iron, 120% vitamin A and 130% Vitamin C. Darned good nutritionally and marvelous winter food!

Yours in good taste, © Nancy Guppy, RD, MHSc.  http://nancyguppy.com/


Saturday, October 18, 2014

Rhubarb, Cranberry and Thyme Crumble with Coconut Flour Oat Topping


This rhubarb cranberry crumble was absolutely delicious. I made this lovely dessert at camp in Temagami last summer in the vintage oven I so love.  It was sweetened with local honey and fresh orange juice and I sprinkled on thyme leaves and blossoms for an interesting twist.


Click on this link for a printable recipe.

INGREDIENTS:

Topping
2 cups (500 ml) oats, large flake
1/2 cup (125 ml) coconut flour
1/4 - 1/2 cup (60-125 ml)brown cane sugar, organic
1/2 tsp (2.5 ml) cinnamon ground
1/3 cup (85 ml) butter or coconut oil

4 cups (1 litre) Rhubarb, sliced
2 cups (500 ml) Cranberries, fresh or frozen
1 Tbsp (15 ml) orange zest (avoid the white pith)
Juice medium size orange - about 3/4 cup - 175 ml
1 Tbsp (15 ml) fresh thyme leaves stripped off the stems.  Include blossoms if available
1/2 - 2/3 cup (125 - 175 ml) local honey 

METHOD:
1.  Make topping by combining large flake oats, coconut flour, brown cane sugar, cinnamon and butter.  Mix with your clean hands until crumbly.


2.  Oil a deep-dish pie plate or square baking dish.  Slice rhubarb into half inch pieces and spread over bottom of baking dish.  Spread fresh or frozen cranberries evenly over rhubarb.


3.  Sprinkle with fresh orange juice, zest of orange, fresh thyme and honey.


4.  Sprinkle topping over filling.  This is easiest to do using your hands as you can crumble larger pieces and make sure it is evenly spread out.  Bake at 425 F (220 C) for 40 minutes or until top is golden.  Baking time will vary depending on the temperature of your oven.


Here it is before it went in the oven.  Oops... I forgot to take a picture. 
I think we were too anxious to eat it!


NUTRITION FACTS made with butter (195 g - 1/8th of the pan): 360 calories, 10 g fat, 6 g saturated fat, 20 mg cholesterol, 75 mg sodium, 65 g carbohydrate, 8 g fibre, 40 g sugar, 5 g protein. %Daily Values are 8% vitamin A, 40% vitamin, 8% calcium and 10% iron.

Yours in good taste,

© Nancy Guppy, RD, MHSc
http://nancyguppy.com/

Saturday, June 8, 2013

Rhubarb Custard Ramekins (Gluten Free)


My friend Suzanne said today "rhubarb, rhubarb, rhubarb.  We are so blessed to have so much rhubarb!"  My sentiments exactly.

Here is a simple baked custard with rhubarb that can be eaten as dessert and even breakfast!  Good any time of day.  My mom often made a similar rhubarb custard in pastry as "pie" for our family.  I have added more flour to the ingredients to make it more cake-like.  It may seem like a lot of nutmeg but it blends in well and the end result is not overpowering.

Rhubarb has the right kind of fibre to keep you regular.  Follow this link to find out more about growing and cooking with rhubarb  http://www.chapmanslanding.blogspot.ca/2009/05/rhubarb-year-of-food-by-season.html


INGREDIENTS:
butter or oil for ramekins
4 cups rhubarb, sliced, fresh - 1 litre
3 eggs, medium or large
3/4 cup brown sugar - 175 ml (I used organic)
3 Tbsp milk of your choice - 45 ml
1/4 cup brown rice flour (or your choice - I used Bob's Red Mill brand) - 60 ml
3/4 tsp nutmeg, ground - 3.75 ml

METHOD:
1.  Butter/oil three ramekins or oven proof bowls and place on baking tray.  They should have capacity for 1 1/2 cup (375 ml) as the recipes puffs up and you don't want them to run over when they bake.  Set aside.  
2.  Slice rhubarb and divide among dishes.
3.  Mix eggs, sugar, milk, flour and nutmeg in blender or food processor.  If you don't need a gluten free version whole wheat flour works well.  Pour equally over the rhubarb in the ramekins.


4.  Bake at 350'F for 30-40 minutes or until custard is set.  Test centre with knife to make sure they are cooked through and liquid is absorbed.


NUTRITION FACTS (per one ramekin or 1/3rd recipe): 360 calories, 6 g fat, 2 g saturated fat, 165 mg cholesterol, 90 mg sodium, 72 g carbohydrate, 4 g fibre, 56 g sugar, 8 g protein.   % Daily Values are 4% Vitamin A, 20% Vitamin C, 25% calcium and 10% iron.


(c) Nancy Guppy, RD, MHSc.  
Visit my website to find out more about online nutrition counselling. http://nancyguppy.com/ 


Tuesday, October 2, 2012

Zucchini Cheese Pie

I made two of these pies for brunch last weekend.  It is a recipe I have been making since I was in my early 20's  Helped get me through university cheaply.  It is pretty easy to make and popular - I had a "never eat zucchini person" have a large piece.  The original recipe used Bisquick mix but I replaced it with a good flour, baking powder, sugar/honey, olive oil and some salt.  I made mine gluten free with sorghum flour but you can substitute wheat flour.  Doubles well and freezes well.


This pie looks nice baked in a cheesecake type spring form pan and decorated on top with slices of zucchini and fresh herbs.  You can use other cheese - I've made if before with half gouda and half goat cheese.  This one just good aged parmesan and a old cheddar.  We ate it before a picture of the baked pie was ever taken!  I'll an update with a photo shortly.

Makes one pie - 6 servings

INGREDIENTS:
3 cups zucchini, diced - 750 ml
4 eggs, medium
1/4 cup olive oil - 60 ml
1/2 cup onion, diced - 125 ml
1 cup whole grain flour - I used sorghum - 250 ml
1 1/2 tsp baking powder - 7.5 ml
1/4 tsp salt - 1.25 ml
1/2 tsp black pepper, freshly ground - 2.5 ml
1 tsp sugar or honey - 5 ml
2 Tbsp parsley, fresh, chopped - 30 ml
1 Tbsp basil, fresh, chopped - 15 ml
1/3 cup parmesan cheese, shredded - or other hard grating cheese like Romano - 75 ml
1 cup cheddar cheese, extra old, shredded - 250 ml

1. Chop the zucchini.  You need 3 cups.  I used a bit more per pie.  Set aside some nice slices for the top if you have enough.


2. Puree the eggs, onion, olive oil, diced onion, flour, baking powder, sugar/honey, salt, pepper and fresh herbs in blender or food processor.


3. Pour into a large bowl. Stir in the grated cheese.  It is a stiff batter. Pour into an 8 x 8" greased pan or deep dish pie plate. I also make this in a spring form pan - like one you'd use for a baked cheese cake.  Decorate top with some squash slices and fresh herbs pressed into the batter.


 Bake 45 minutes in a 350'F oven. Serve warm or cold. Small slices are nice as appetizers.


NUTRITION FACTS (per 1/6th pie): 320 calories, 21 g fat, 7 g saturated fat, 135 mg cholesterol, 420 mg sodium, 20 g carbohydrate, 3 g fibre, 14 g protein.  %Daily Values: 8% vitamin A, 25% vitamin C, 25% calcium and 10% iron.  %DV are based on a 2,000 calorie diet

(c) Nancy Guppy, RD, MHSc.

Visit my website to find out more about online nutrition counselling. http://nancyguppy.com/

Friday, May 4, 2012

Mint magic vinaigrette and marinade

This is a simple, delicious salad dressing you can make quickly.  We enjoy it on early lettuce, spring onion and herb salads.  It is also good as a marinade for chicken, fish, lamb, tofu or bean salads.  Very versatile.  


Where I live there is no shortage of mint!  Ha, there are at least four kinds growing.  There is old fashion spearmint that was here on the farm when I moved in as well as peppermint, Swiss mint and a cat mint (nip) I since planted.  I love them all and use it in numerous ways.  I use mint fresh or dried throughout the year in hot and cold tea.  Aids digestion.  Reduces gas.  I also like it in salad and am particularly fond of the Egyptian Mint Potato Salad posted last year at my blog.  

If you are a novice to growing mint be advised that it will eventually take over.  Many people look for an out-of-the way spot for their mint.  Alternately, grow it in a container set in the ground to prevent the roots from spreading.  Follow this link if you want to read more about how to use mint along with nutritional and medicinal benefits that I wrote a few years ago.

Makes a generous cup (250 ml) - Feel free to cut the recipe in half if you want less

INGREDIENTS:
1/2 cup (125 ml) mint leaves, fresh, packed
1/4 cup lemon juice, fresh squeezed (about 1 lemon)
1 tsp (5 ml) lemon zest/peel
1/4 cup (60 ml) vinegar of your choice - I used Eden apple cider
1 green onion, whites & greens, cut in chunks
1 tsp (5 ml) black pepper, freshly ground
3/4 cup (175 ml) olive oil, XV, cold pressed
1 Tbsp (15 ml) honey, liquid - I used Board's garlic honey

METHOD:
1.  Add fresh mint, fresh lemon juice and peel/zest, vinegar, green onion cut into chunks and freshly ground black pepper to bowl of blender. Blend on high until very smooth, 1 to 2 minutes.


2. Add the olive oil and honey and blend on low speed for another minute or so until oil is incorporated and dressing thickens.  I used a delicious garlic honey (from Board's Honey Farm).


3.  Pour into a glass jar and store in the refrigerator until ready to use.   l like to recycle glass bottles and jars for this kind of use.  Bring to room temperature before serving.


Nutrients Per 15 ml (one tablespoon)

Calories
70
Total Fat (g)
7
Saturated Fat (g)
1
Carbohydrate (g)
2
Fibre (g)
0
Sugar (g)
1
Cholesterol (mg)
0
Sodium (mg)
0
Protein (g)
0
%DV

Calcium
0
Iron
2
Vitamin A
2
Vitamin C
4


© Nancy Guppy, RD, MHSc.  Visit my website to find out more about online nutrition counselling. 
http://nancyguppy.com/